
Table of Contents
- Aesthetic Room Decor on a Budget: Where to Start
- Aesthetic Bedroom Lighting Ideas That Cost Under $30
- DIY Wall Decor Ideas for Bedroom Walls You Cannot Drill
- Floating Shelf Decor Ideas for Small Spaces
- No-Spend Room Makeover Ideas Using What You Own
- Budget-Friendly Wall Art and Posters That Look Expensive
- How to Make a Room Look Expensive on a Low Budget
- Conclusion: Your Aesthetic Room Starts With One Change
- Frequently Asked Questions
Last Updated: October 5, 2026
Aesthetic Room Decor on a Budget: Where to Start
Building aesthetic room decor on a budget starts with one rule: change the light and the walls before anything else.
Aesthetic room decor is the practice of arranging lighting, wall pieces and small accents so a room reads as one deliberate style rather than a collection of random purchases.
Most budget guides hand you a shopping list and skip the sequencing.
Aesthetic Bedroom Lighting Ideas That Cost Under $30
The cheapest way to change how a bedroom feels is to stop relying on the ceiling light. Overhead fixtures flatten a room and wash out color; layered, low-level light adds depth instead, for under $30 per piece.
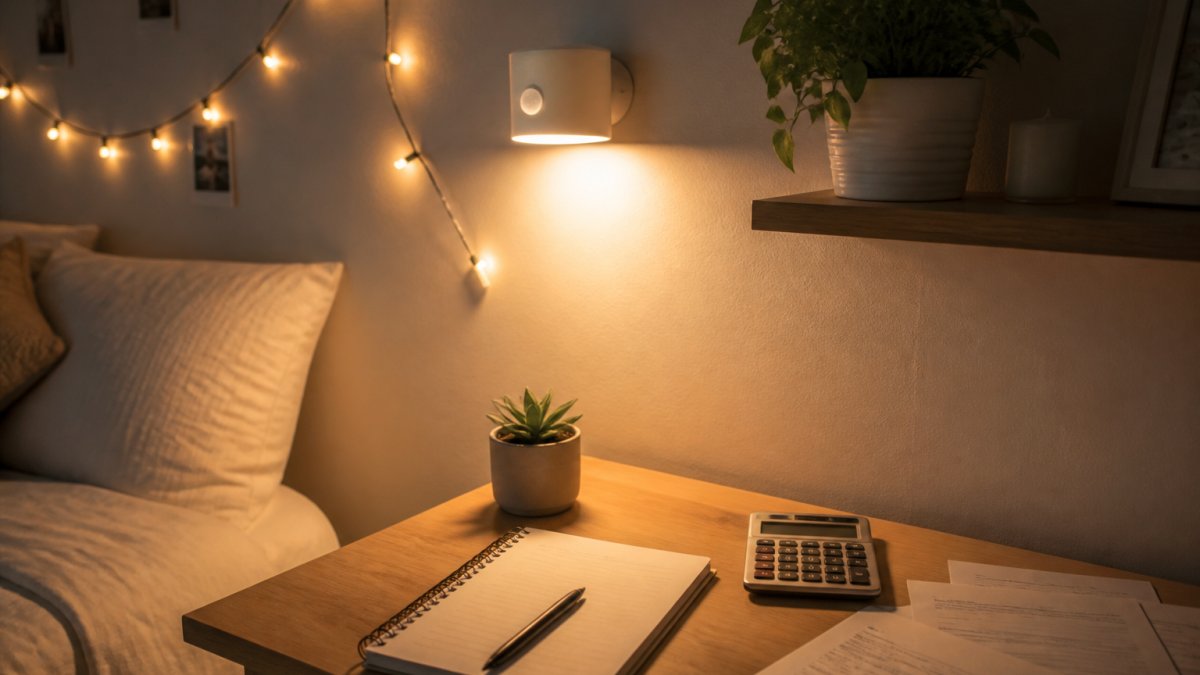
Start with one or two rechargeable wall lamps, they skip wiring entirely, which matters in a rental or dorm. Then add a second light source at a different height and a third with a warmer tone.
Motion-Sensor Wall Lamps for Renters
Motion-sensor wall lamps are the most renter-friendly lighting upgrade you can buy. They mount with adhesive or a small bracket, need no wiring, and charge over USB like a phone.
Our Wireless USB Rechargeable Decor Wall Lamp runs $19.99 and covers 3-5 metres of sensing distance with a 120-degree angle.

Both mount without drilling, so this works in a room where you cannot put a single hole in the wall.
Layering Warm and Cool Light
Warm light at 3000K makes a room feel settled; cool light at 6500K keeps it sharp and awake. Use warm tones for the evening, cool for studying.
A simple layering formula:
- One warm source at low height, such as a wall lamp near the bed
- One cooler source at desk height for tasks
- One soft accent, like fairy lights or a small clip lamp, along a shelf edge
Three sources at three heights beat one bright fixture every time.
DIY Wall Decor Ideas for Bedroom Walls You Cannot Drill
DIY wall decor for a bedroom you cannot drill into comes down to weight and surface. Anything under roughly a kilo can hang on removable adhesive strips or hooks, provided you clean the wall first and let the adhesive set for an hour.
Test on a hidden patch first. Fresh paint, textured wallpaper and cheap plasterboard all behave differently, and a strip that peels paint is a deposit you will not get back.
Damage-Free Hanging Methods
Ranked by how much weight they hold and how kind they are to the wall:
- Adhesive strips: Best for posters, lightweight prints and small frames. Clean the wall, press for 30 seconds, wait an hour.
- Adhesive hooks: Good for fairy lights, small tapestries and lightweight organisers.
- Over-door hooks: Zero wall contact. Ideal for a mirror or a light robe.
The mistake we see most: loading a strip the moment it goes up. Adhesive needs time to bond, and skipping that hour is why people swear the strips "never work."
Floating Shelf Decor Ideas for Small Spaces
Floating shelf decor ideas for small spaces work best when the shelf does two jobs at once. A shelf that only displays wastes floor-to-ceiling space; one that displays and stores is a win.
Shelf Placement Math for Small Rooms
Before you style anything, get the height right. Interior stylists commonly mount a display shelf at eye level, roughly 135-150cm from the floor.
Leave at least 30cm of clear wall on each side so the shelf reads as a deliberate anchor rather than a strip glued to the wall, and keep at least 45cm between the shelf underside and any furniture top below it.
The Three-Pass Styling Method
Style a shelf in three passes: one tall object, a stack of two or three books laid flat, then something small and organic like a plant or candle.
Group in odd numbers: three objects read as intentional, four as leftover. Vary heights within the group, a tall vase, a mid-height book stack and a low dish create a triangle the eye can follow.
Weight Limits and Mounting Reality
A floating shelf is only as good as its fixing, which determines what you can put on it.
- Adhesive-mounted shelves: Treat these as display-only. Most adhesive strips and hooks are rated for a few kilograms at best, assuming a clean, flat, painted surface, a hardcover book stack can approach that limit. Keep them to lightweight items: a small plant, a candle, a few paperbacks.
- Screw-fixed shelves into studs or with proper wall anchors: These hold real weight, but only if you are allowed to drill, often off the table in a rental.
- Tension-rod or over-door shelf alternatives: If you cannot drill and cannot trust adhesive with weight, use an over-door organiser or tension-rod shelf inside a closet for storage, keeping the visible wall for lightweight display only.
Small-Space Shelf Layouts That Work
Three layouts cover most small bedrooms:
- The desk bridge. One shelf 45-60cm above a desk. Store pens and notebooks in a tray on one end, display a plant and framed print on the other. It extends the desk without taking floor space.
- The bedhead ledge. A narrow shelf above the bed, high enough that you cannot hit it sitting up. Keep it to a small lamp, a book and one object, it replaces a bedside table in tight rooms.
- The corner stack. Two short shelves staggered at different heights rather than stacked directly. This uses dead corner space and avoids the crowded look of one tall unit.
Each costs the same as a single shelf; the difference is placement, not purchase.
Indoor Sensing USB Charging Wall Lamp →
No-Spend Room Makeover Ideas Using What You Own
A no-spend room makeover means you rearrange, repurpose and remove rather than buy. Most rooms improve more from subtraction than addition, and this is the step people skip because it is not as fun as shopping.
But "no-spend" does not mean "no-plan." The difference between a makeover that works and one that just moves clutter around is sequencing. Work through the phases below in order.
Phase 1: Subtract (0 cost, 30-45 minutes)
Clear every surface, shelf, windowsill, nightstand, into a box or onto the floor. Then put back only what you actually use in a given week.
A common pattern is that roughly half of what was on the surfaces does not go back. That half is your clutter, and it was costing you visual space for free.
Phase 2: Rearrange (0 cost, 20-30 minutes)
Pull furniture away from the walls and angle one piece instead of squaring everything. In a small bedroom, angling a desk or chair by 15-20 degrees breaks the boxy feel and creates a visual path into the room.
Then swap items between rooms: a living-room lamp can change a bedroom entirely, and a hallway rug can anchor a seating corner.
Phase 3: Repurpose (0 cost, 10-20 minutes per item)
- Turn a scarf, sarong or spare fabric into a wall panel using an adhesive hook. A 90cm x 90cm scarf covers a meaningful patch of blank wall and weighs almost nothing.
- Move existing art to a different wall and regroup it. A print that looked lost on a wide wall can anchor a narrow one.
- Wash and re-dress the bed with your lightest bedding for a brighter look, nothing but a laundry cycle.
Phase 4: Renter-Safe Execution
This is where most no-spend guides stop, and it matters most if you rent or live in a dorm: every move above has to be reversible.
- Adhesive hooks and strips: Clean the wall with isopropyl alcohol, press for 30 seconds, and wait a full hour before loading. Fresh paint and textured wallpaper peel most easily, so test on a hidden patch first.
- Over-door hooks: Zero wall contact. Use these for mirrors, robes, and lightweight fabric panels.
- Tension rods: Work inside a window frame or between two walls for a lightweight curtain or fabric panel. No holes, no adhesive.
What This Actually Costs
Nothing, if you follow the phases as written. The only optional spend is a pack of adhesive hooks or strips, typically a few dollars and reusable across moves if you keep the backing paper.
If you want one step further without breaking the no-spend rule, the mirror trick and the fabric panel deliver the biggest visible change for the least effort.
Budget-Friendly Wall Art and Posters That Look Expensive
Wall art is where budget rooms either come together or fall apart, and the difference is almost never price.
One large piece beats five small ones: a single decent-sized print anchors a wall, while a cluster of small cheap prints reads as clutter.
Choose paper finish deliberately. Our Montana Vintage Travel Poster at $25.99 comes in three paper textures, including textured fine art stock and a low-reflective matte, with multiple sizes and orientations.

Both ship rolled, so they arrive ready to frame or to hang flat with clips if you would rather skip the frame cost.
How to Make a Room Look Expensive on a Low Budget
Making a room look expensive on a low budget comes down to five moves, none requiring new furniture.
- Match your metals. Pick one finish, gold or black or brushed steel, and stay with it across lamps, hooks and frames.
- Stick to three colors. One base, one neutral, one accent. More than that and the room reads as busy.
- Hide the cables. Adhesive cable clips cost almost nothing and remove the single biggest giveaway of a cheap setup.
- Go high with curtains. Mount the rod near the ceiling rather than at the window frame. It pulls the eye upward and makes the ceiling feel taller.
- Add texture. Linen, cotton blends and natural fabrics soften a room in a way that plastic and polyester cannot.
Here is how the two lighting options compare if you are deciding between them:
| Product | Price | Battery | Light Color | Best For |
|---|---|---|---|---|
| Wireless USB Rechargeable Decor Wall Lamp | $19.99 | 1200 mAh | Warm or white | Renters wanting the lowest-cost entry |
| Indoor Sensing USB Charging Wall Lamp | $24.99 | 2000 mAh | 3000K warm and 6500K white | Rooms needing one lamp to do two jobs |
Both are one-time purchases with no subscription required. If you only want one or two pieces, buy them outright; the 10% first-order discount comes with a subscription, but nothing forces you to keep it.

Conclusion: Your Aesthetic Room Starts With One Change
The hardest part of a budget makeover is not the money, it is deciding what to change first when everything feels like it needs work.
Apply Your Vibe stocks the pieces that work together, from rechargeable motion-sensor wall lamps to rolled vintage travel posters with three paper finishes, so you are not guessing whether your picks will match.
Frequently Asked Questions
How do I make my room aesthetic on a low budget?
Start with lighting, then layer in wall decor and shelving. A rechargeable wall lamp under $30 changes the whole mood of a room more than any furniture swap. Add a poster or two, arrange what you already own on a floating shelf, and keep your color palette to two or three tones. Most aesthetic room decor on a budget comes down to lighting temperature and tidy surfaces, not expensive pieces.
What are some easy DIY wall decor ideas for a bedroom?
Print photos at a local shop and clip them to a string with mini clothespins. Frame pages from old books or magazines. Paint cardboard into geometric wall shapes. Use fabric panels or a tapestry as a large-format backdrop. Command strips and adhesive hooks hold all of these without drilling, so renters and dorm residents can hang DIY wall decor ideas for bedroom walls without losing a deposit.
How can lighting make a room feel more aesthetic?
Lighting sets the mood before any other decor registers. A single overhead bulb reads as harsh and flat. Two or three small sources at different heights, like a motion-sensor wall lamp, a desk lamp, and string lights, create depth and warmth. Choose 3000K warm light for evenings and 6500K white light for tasks. Rechargeable options mean no wiring and no electrician.
What should I buy first for an aesthetic room?
Buy lighting first, then wall art, then shelving. A rechargeable wall lamp and a poster or two cost under $55 together and change a room more than any other purchase at that price. Floating shelves come third because they display what you already own. Skip accent furniture until the walls and light feel right.
Can I decorate a rental without damaging the walls?
Yes. Adhesive hooks, Command strips, and double-sided adhesive iron sheets hold wall lamps, posters, and lightweight shelves without screws. Tension rods work in closets and windows. Freestanding shelves and leaning art need no hardware at all. Always test adhesive on a hidden patch first, and follow the weight limits on the packaging.
A quick note on sourcing: before buying anything, check your tenancy agreement or dorm rules on wall fixings. Adhesive products are widely renter-friendly, but the only authority on what your specific landlord allows is your own agreement.